Tag Archives: Automation

A long time ago I became frustrated with having to update my WordPress plugins manually, so I created a Perl script and a blog post (https://blog.vpetkov.net/2011/08/03/script-to-upgrade-plugins-on-wordpress-to-the-latest-version-fully-automatically/) that explained how to automate this. The idea was quite simple: feed a plugin name, have the script check the WordPress plugins page for the latest versioned download, grab it, and extract it over the specified blog plugins directory and thus update the plugin.

The script was simple and it worked very well. It made dealing with plugins many times easier. However, there was one big down side as some users pointed out — it did not actually check if a plugin needed to be updated. It blindly replaced the current plugin with the latest version. This meant that there was no way to “efficiently” automate it. If you cron-ed it directly, it would simply pull and update all your plugins at whatever period you specified. For the longest time this really irritated me, but I didn’t have time to dig through WordPress to understand how the engined checked and signaled for local plugins. One particular user (Joel) forked a copy and made many improvements to deal with this specific issue.

As time went on, I decided to look at this problem again. A couple of years ago I solved it in a really elegant way, but I didn’t have time to update the blog post. A few days ago, after looking at the blog statistics, I realized that the WordPress article was one of the top 10 most popular ones. So, with that said, here is:

A new simple and elegant solution

The idea is to use the WordPress CLI in order to “query” the local plugins database for plugin names, version number, and “activated” status, and then compare the “local” plugin version with the “remote” plugin version. If the plugin is active and in need of an update, fall back to my original Perl script to update it. Aha! And now we have something that can be cron-ed 🙂

To get started, first grab the WP CLI utility. We are going to rename it, move it to an accessible place, and take care of permissions so that we can use it:

Continue Reading →Easy fully automated WordPress plugin update system
NOTE: Updated code 10-27-2018

In this day and age where everything is measured, recorded, and available remotely (via a REST API most of the time!), it really bothered me that our heating oil tank measured the remaining gallons of oil by a crude plastic dip stick. It’s not accurate, there is no historical data, and there is no way to audit (for honesty, accuracy, or problems/errors).

So the problem is simple enough: Find a quick and easy way to remotely monitor the number of gallons of heating oil in a home, and alert at pre-set intervals (let’s say 75%, 50%, and 25%) of remaining oil in the tank.

After looking for commercial solutions, the cheapest one I found is $120 with a $10/year fee. In my view, that’s simply ridiculous. I decided that I could build something better for 1/3rd of the price ($40), without an yearly fee.

Hardware How-To

Start with this Instructable I created with the exact parts/steps, and with lots of pictures:
https://www.instructables.com/id/Monitor-Heating-Oil-Tank-Gallons-With-Email-SMS-an/

This should take care of the hardware side.
Continue Reading →DIY – Monitor Heating Oil Tank Gallons with Pushbullet, SMS, and Email Alerting

You need to connect to a Cisco AnyConnect (or Juniper Pulse Connect) VPN, and you cannot stand the default client for a variety of reasons (slow connects, crashes, unable to start, pointless pop-up notifications, crashes, pid-loss, etc), and so, you look for alternatives.

You find OpenConnect – the perfect solution, only to realize that the 3rd-party GUI is basically broken and actually doesn’t work (last checked on 8-14-17) with 2-Factor authentication (ex: Duo).

At this point, you can run OpenConnect from a terminal, which works, but you have to keep the terminal open and you have to wrap the long command in a shell script.

Or, you can use my little solution which seems to work perfectly.

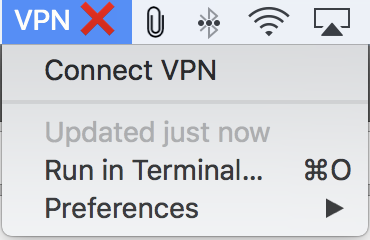
OpenConnect GUI - Connected

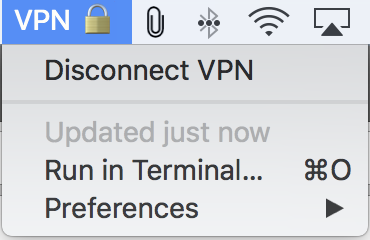
OpenConnect GUI - Disconnected

Everything you need to get started is on GitHub:
https://github.com/ventz/openconnect-gui-menu-bar

Continue Reading →The perfect OpenConnect GUI Menu Bar App with 2FA/Duo support – for Mac OS X

If you have not used Swarm, skim the non-service-discovery tutorial to get a feel for how it works:
https://blog.vpetkov.net/2015/12/07/docker-swarm-tutorial-and-examples. It’s very easy, and it should give you an idea of how it works within a couple of minutes.

Using Swarm with pre-generated static tokens is useful, but there are many benefits to using a service discovery backend. For example, you can utilize network overlays and have common “bridges” that span multiple hosts (https://docs.docker.com/engine/userguide/networking/get-started-overlay/). It also provides service registration and discovery for the Docker containers launched into the Swarm. Now lets get into how to use it with service discovery – which is what you would use in a scaled out environment/production.

Again, assuming you have a bunch of servers running docker:
vm01 (10.0.0.101), vm02 (10.0.0.102), vm03 (10.0.0.103), vm04 (10.0.0.104)

Normally, you can do “docker ps” on each host for example:
ssh vm01 ‘docker ps’
ssh vm04 ‘docker ps’

If you enable the API for remote bind on each host you can manage them from a central place:
docker -H tcp://vm01:2375 ps
docker -H tcp://vm04:2375 ps
(note: port is optional for default)

But if you want to use all of these docker engines as a cluster, you need Swarm.
Here we will go one step further and use a common service discovery backend (Consul).

Docker Swarm Tutorial with Consul and How-To/Examples

Continue Reading →Docker Swarm Tutorial with Consul (Service Discovery) and Examples

[ updated 10-30-2016 | Upgraded Plex to plexmediaserver-1.1.4.2757-24ffd60.x86_64.rpm and CentOS ]

Recently I tried setting up a Plex server in a docker container. The first problem was the 127.0.0.1:32400 bind which required logging in locally or port forwarding. After doing this once, I realized that you could use the Preferences.xml file, but that meant that you couldn’t truly automate this/deploy it elegantly in a docker container. And what if you wanted to run other servers — for friends? I finally figured out how to do this in the most elegant way possible.

First – Grab your Unique Plex Access Token

Login at https://app.plex.tv/web/app with your username and password
Open your javascript console (in Chrome: View -> Developer -> JavaScript Console)
and type:
console.log(window.PLEXWEB.myPlexAccessToken);

Note the token, which will look like this: “PZwoXix8vxhQJyrdqAbY”

At this stage DO NOT click log out of your account until you register the new server. Otherwise your token will regenerate.
Once you register the server, it won’t matter after that if the token changes.

Grab my Docker Image

Check out: https://hub.docker.com/r/ventz/plex/
You can pull it down by doing:

Continue Reading →Plex server on a VPS Docker setup without port forwarding

A bit of background and the “old/normal way”

If you use Docker, you very quickly run into a common question: how do you make Docker work across multiple hosts, datacenters, and different clouds. One of the simplest solutions is Docker Swarm. Docker summarizes it best as “a native clustering for Docker…[which] allows you create and access to a pool of Docker hosts using the full suite of Docker tools.”

One of the biggest benefits to using Docker Swarm is that it provides the standard Docker API, which means that all of the existing Docker management tools (and 3rd party products) just work out of the box as they do with a single host. The only difference is that they now scale transparently over multiple hosts.

After reading up on it HERE and HERE, it was evident that this is a pretty simple service, but it wasn’t 100% clear what went where. After searching around the web, I realized that almost all of the tutorials and examples on Docker Swarm involved either docker-machine or very convoluted examples which did not explain what was happening on which component. With that said, here is a very simple Docker Swarm Tutorial with some practical examples.

Assuming you have a bunch of servers running docker:
vm01 (10.0.0.101), vm02 (10.0.0.102), vm03 (10.0.0.103), vm04 (10.0.0.104)

Continue Reading →Docker Swarm Tutorial and Examples

[updated: March 29th, 2015 | Aman Surana created a great youtube video on how to do this. The main difference is that he is using a plugin (comes as an app which extends Tasker) called AutoNotification. The biggest benefit is that it abstracts the application notification layer into a standard set of variables. This allows you to utilize apps other than the main SMS app (ex: now you can use things like WhatsApp, Google Hangouts, etc). It also works with the latest version of Android, which I am starting to get the feeling that my profiles bellow do NOT work with anymore. Anyway, you can find the video here: https://www.youtube.com/watch?t=37&v=c-Kp9KynlV4, and read the post here since the idea behind how to do this still holds. That and it’s an interesting way to accomplish this task – no pun ;)]

I walk outside listening to Pandora quite a lot, and today I realized that I miss about half the SMS’ that I get. Either because it’s too noisy, or maybe because the SMS’ are not loud enough and I use a single beep, or because the sound trigger gets interrupted by Pandora, but either way, it’s a bit annoying. I have been considering some sort of a solution that will play incoming SMS messages when my headphones are plugged in for quite some time, but I couldn’t think of an efficient way to do it — that is, efficient on the battery. I think I came up with one today.

The idea behind this Tasker program is the following:

There are two Profiles: ‘Detect Headphones‘ and ‘Play Text Over Headphones‘. Only one Profile has to be actually active at all times – the Detect Headphones one. When you plug in your headset (with microphone, or just regular headphones), the profile sets a variable %HEADPHONES to ‘yes’. It then turns on the second Profile – the one that monitors incoming SMS messages and plays them over the headset if your %HEADPHONES variable is set to ‘yes’.

Continue Reading →Speak SMS over the Head Phones only when they are plugged in

The general idea behind this is that it utilizes my original Blackberry Sound Profiles for Android and it adds a “timer” element which can be set. Upon setting the timer, it will set a temporary task until the timer runs out. The idea came from one of my visitors who asked me how to do this. At first, I had no idea how to do it. About 30 minutes later I had a semi-working prototype. Another 3 hours later (had to figure out how Scenes worked and interacted with variables and the rest of the system) I had the final version with a working GUI.

The first thing that you need are my Tasker Blackberry Sound Profiles found here: (http://blog.vpetkov.net/2011/05/10/my-tasker-program-blackberry-sound-profiles-for-android). If you don’t have them yet, follow the super quick “Getting Started” section. Once you have the tasks and you have them working (if you want this to work out of the box, grab at least the “Work” task and the “Sleep” task), download the Timed extension:

Note: You need the current BETA to import this profile: http://tasker.dinglisch.net/beta.html (1.2.1b4m)

Timed.zip
(md5: 5709a9ed0b139a027900d9f8f1e2e92a)

Now unzip it and follow the same steps from the original post – grab the “Timed.tsk.xml” file and import it into the the Tasks tab, and then grab the “TimedScene.scn.xml” file and import it into the Scenes tab. Go to your home screen and create a Tasker widget of your “Timed” task. Every time you select this task, it will pop a box which will let you use a slider or directly type in a number. After this, when you hit “Set Profile”, the temporary task (by default “Sleep”) will get activated for the number of minutes you set. After that time period it will go back to the other (by default “Work”) task.

Continue Reading →Timed Blackberry Sound Profiles for Android

This is an update to the article “My Tasker  program – BlackBerry Sound Profiles for Android” (http://blog.vpetkov.net/2011/05/10/my-tasker-program-blackberry-sound-profiles-for-android). Download the new file here, read through “what has changed”, and “what I have updated”, and then definitely read the original post (url above) as it contains all the details and how-to information.


What Has Changed:

There are a couple of things that Google has drastically changed in ICS 4.0 when it comes to Sound, Vibrate, and Volume.

First of all, they have greatly simplified the Sound Settings. The Volume menu now contains: “Music,Video, Games, and other media” as one volume toggle, then “Ringtone and notifications” as another, and Alarms as a third. Something to note here is that the keyboard “clicking” sound can now be found under the keyboard settings -> under Advanced.

The Second change is the way “Vibrate” has been re-implemented. The new “Silent Mode” controls three things currently: Sound, Mute, and Vibrate. This is important as this was completely broken on 2.3. The next thing to note is the “Vibrate and Ring” option, as this has a negative effect when toggled on via Vibrate (it’s still sticky for some reason, but due to Silent Mode being fixed, we can now un-toggle it via Tasker).

Continue Reading →Tasker – ICS (Android 4.0) – BlackBerry Sound Profiles

UPDATE: Please check out latest version from my git repo: http://git.vpetkov.net/projects – project name: “pandora”

It seems that Pandora is not putting too much time or thought into how they provide and access music online through their website. I really hope they fix this since it’s irresponsible as far as the the DMCA is concerned. Each song is simply an encoded token, and it’s pulled down directly from, presumably, one of their proxy server. If you look at the stream while playing songs on pandora.com, you will notice something like this (ex: not real):

Some assumptions: the “version=4” is high quality or what used to be CD quality (192 kbps). The “lid=#####” is the “login id”, or your unique user number. The “token=…” is the actual song, encoded. By finding the host of these requests, and putting it all together, where the lid is completely optional, you will have a full request URL to a song.

Imagine putting it together like this: (example as a POC, like this)

Then having something that parses this “buffer”:

One way for them to fix this would be to session encode the requests. You should not be able to make requests that originate from outside of pandora.com directly to the servers. Also, the requests should be authenticated. As an addition, they could potentially be checked against what is “played” and controlled for streaming mechanisms. I really hope this fix this as soon as possible.